Friday, November 19, 2010

Joseph Louis

Just wanted to share with you all a few of the new pics of Baby Joseph from our sonograms.  He is growing so big and LOVES moving around at night while mom and dad are sleeping or trying to ; )  

Here you can see he is sucking his thumb. Those are his
fingers coming sideways from his face.  You can also see his lips
puckered if you look closely.
This is the back of him.  He looks like he is leaning his head against
his hand.  I think he is telling us he is bored.
This is from our most recent ultrasound.  He is getting big :)
You can see one of his eyes. 
I have to stop myself from going into too many children's stores because I always end up buying him something.  Here is one of my most recent purchases.  I couldn't help myself... He is going to look so handsome! 
Joseph's newest outfit

Project #3 Upholstered Headboard

It had been bothering me for quite a while that there was no headboard to our guest bedroom bed.  The space just felt incomplete and bare.  The guest bedroom felt more like an office that happened to have a bed in it instead of a bedroom that happened to have a desk in it.  I had been thinking of different things we could use as a headboard in the bedroom but I really wanted to make one.  I convinced Philip that it would be a great idea and after much work and a little bit of money we completed our upholstered headboard project!  

Here is our Fabric!
Here we are after stapling the mattress pad and about
to start stapling the fabric.
First we had to decide how large to make the headboard.  We made it to fit a queen size bed even though the bed in our guest room is only a full size bed.  I wanted to keep our options open whenever we move or if we ever get a new bed.  We purchased a piece of plywood at Lowes and had them cut it down to the size we wanted.  We had an adventure trying to get this HUGE piece of plywood back to our house.  We managed to fit it in the car with the seats down but couldn't close the trunk.  This normally would have been fine but it was just a little cold riding with the trunk open since it was snowing as we were driving home :)

Making an upholstered headboard requires plywood, upholstery foam, batting, fabric, hot glue and a staple gun.  Upholstery foam is VERY expensive so we saved money by buying an egg crate mattress and putting the egg crate side down.  We also used an old mattress pad as batting which I think ended up making it sturdier and saved us more cash :)


Here is a closer view of stapled
mattress pad.
We picked out fabric at JoAnn Fabrics and I was SO excited about it! I LOVE the fabric!  It was not wide enough to cover the width of the headboard so I had to sew some on to each side and make sure the stripes repeated correctly.  After finally finishing sewing we could assemble the headboard! 


We hot glued the egg crate mattress to the headboard and cut off the excess.  We then wrapped the mattress cover around the foam and plywood and stapled it to the back.  Then we wrapped the fabric around the headboard and stapled it to the back.  We had to make sure the fabric lined up correctly with the headboard sides because we didn't want crooked stripes going up the headboard :)  

It turned out great and we are so excited to have visitors come stay in our guest bedroom!!


Finally Completed :)

Thursday, November 18, 2010

Bert and Midge

Cuddling on the couch with Bert and Midge
Sweet Puppies


I'm taking a break from posting about our projects around the house to inform whoever is reading that I really miss my dogs :)  Although I do miss my family more, I at least get to talk to them on the phone.  This is not the case with our family dogs and I miss them very much.  The two families I nanny for each have a dog and I have found my self recently petting them whenever I get the chance just to get some love from a puppy.  Bert and Midge are two of the best dogs in the world (although I may be a little biased)!  I can't wait to get some puppy love when I go home for a visit :)
Even though Sam isn't alive anymore I couldn't write 
a blog about our dogs and not include a pic of my 
favorite old friend :)

Wednesday, November 17, 2010

Project #2... The Desk

The nice blue desk
I don't know if any of you remember seeing pictures of our guest room but we have been very busy working on making it look more like a guest room and office than junk yard.  We FINALLY painted Philip's desk from bright blue to gray.  It was my desk in high school and I thought it was fabulous then but now it is a little bright... especially for my manly husband.


Here are some before and after pictures of the desk :)


OHH Ohh... were half way there...
All Done!! :)
 

Whistle while you work


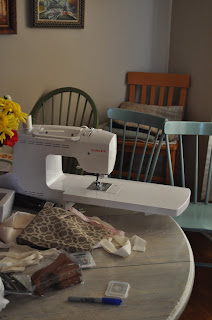
Its been pretty busy around the Martin house lately.  We have been up to our elbows in projects.  It all started when I decided I wanted to work on my sewing skills.  


My first project... 


Window Treatments :)


I found some fabric on sale at Jo-Ann Fabrics that I loved and decided to make window treatments.  The fabric is very busy so I didn't want it to cover the whole window.  I also wanted to add some height to our dining area to make the room look larger.  I knew that I wanted a solid fabric in the middle of my window treatment and the pattern somehow at the top and bottom.  I wanted a cream fabric for the majority of the drapery treatment and after looking around realized that it would be easier and cheaper to buy something simple at target and add some special touches to it.  Here are some pictures my project :)
Here is a picture showing me adding fabric to
the bottom to make it hit the floor.
I made hanging tabs out of the patterned fabric
 and sewed them to the top of the cream
window treatment.


All Finished :)
Another view of the finished window treatments.